🧪 What Is Patch Testing?
Patch testing is a simple, at-home safety check to see if your skin reacts adversely to a new skincare, cosmetic, or hair dye product. By applying a small sample of the product to a discreet area—usually the inside of your forearm, behind the ear, or the bend of your elbow—you can avoid full-face reactions like itching, redness, or swelling before a complete application.
Why Patch Testing Matters
-
Protect Your Skin
Patches help catch both immediate irritations and delayed allergic responses—including those triggered by fragrances, preservatives, or potent actives like retinols or acids. -
Save Time & Money
You’ll avoid wasted products and unnecessary pain by identifying incompatibilities early. -
Customize Your Routine
Self-testing allows you to build a tailored skincare routine based on your unique reactions.

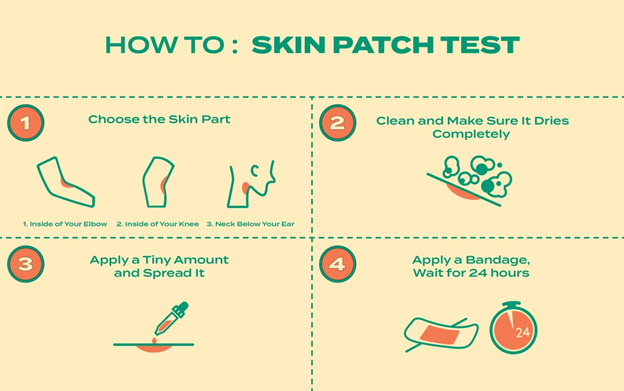
How to Patch Test: Step-by-Step
-
Gather Supplies:
One clean cotton swab or finger, a small bandage or medical tape, and your product. -
Choose a Test Area:
Clean a hidden, undisturbed area—inner forearm, behind ear, inner elbow—and let it dry. -
Apply the Product:
Use approximately a “pea-size” amount and spread evenly as you would normally use it. For rinse-off formulas, apply and rinse per instructions. -
Cover and Wait:
Cover it, if desired, and leave it untouched for 24–48 hours for standard products, or up to 72 hours if the product contains strong actives. -
Observe Results:
Check for redness, swelling, itchiness, bumps, dryness, or blisters. No reaction? You're likely good to go. Any reaction? Discontinue immediately.
What to Do If You React
-
Stop using the product right away.
-
Soothe with a fragrance-free moisturizer or aloe vera gel.
-
Avoid other actives until your skin calms down.
-
Consult a dermatologist if you experience severe symptoms like hives, swelling, or ongoing rash.
Common Culprit Ingredients
Be extra cautious with products containing:
-
Fragrances & essential oils (e.g., limonene, linalool)
-
Preservatives (e.g., parabens, formaldehyde releasers, MCI/MI)
-
Potent actives (e.g., retinol, AHAs, BHAs)
-
Hair dyes or metal allergens (e.g., nickel, P‑phenylenediamine).
Professional vs. DIY Patch Testing
-
At-home tests are ideal for general product safety checks.
-
Professional patch testing (typically conducted by a dermatologist) involves placing multiple allergens under adhesive patches on your upper back for ~48–96 hours. This can pinpoint specific ingredient allergies.
Consider this route if you experience persistent rashes, unexplained dermatitis, or negative reactions across multiple products.
A Real-World Reminder
A Redditor shared her experience after skipping a patch test for a citrus sheet mask:
“Ten‑minute application resulted in significant redness akin to a sunburn ... always patch test.”
TL;DR: Patch Test Checklist
-
✅ Clean a discreet area
-
🧴 Apply a pea‑size amount
-
⏳ Leave for 24–72 hrs
-
🔍 Look for signs of irritation
-
🚫 Discontinue if needed or consult a pro
Patch testing may take time, but it’s a small step with big benefits—for safe and confident skincare.
.webp)
Want More?
-
Learn how professionals detect specific allergens in-office.
-
Discover which skincare ingredients commonly trigger reactions.
-
See video tutorials demonstrating patch test application and monitoring.
-
.webp)
.webp)


No comments:
Post a Comment